

DIY Bluetooth Speaker Project
These builds use either 3D-printed enclosures found on MakerWorld or Harbor Freight Apache protective cases as rugged speaker boxes. They’re relatively inexpensive, durable, easy to carry, and can sound surprisingly good. You’ll find links to the parts I used at the bottom of this page. My personal favorite so far is the Apache 2800 with a single Kicker 6×9 speaker and the ZK-1001U mono amplifier. It offers a great balance of sound, portability, simplicity, and cost.
This is a rabbit hole you can go DEEP into, so it’s up to you how far you want to take it. These are flexible starting points, not precisely engineered speaker enclosures. Speaker selection, placement, sealing, available airspace, and internal bracing will all affect the final sound. I opted for an economical build that sounds good without attempting to make it waterproof. Below, you’ll find a basic “recipe” for both mono and stereo speaker boxes, links to the parts I used, and videos and groups I found helpful. I’ll also include a recommendation for someone who sells premade boxes if you don’t feel like building your own but still want a nice speaker for less than the cost of a Turtlebox.
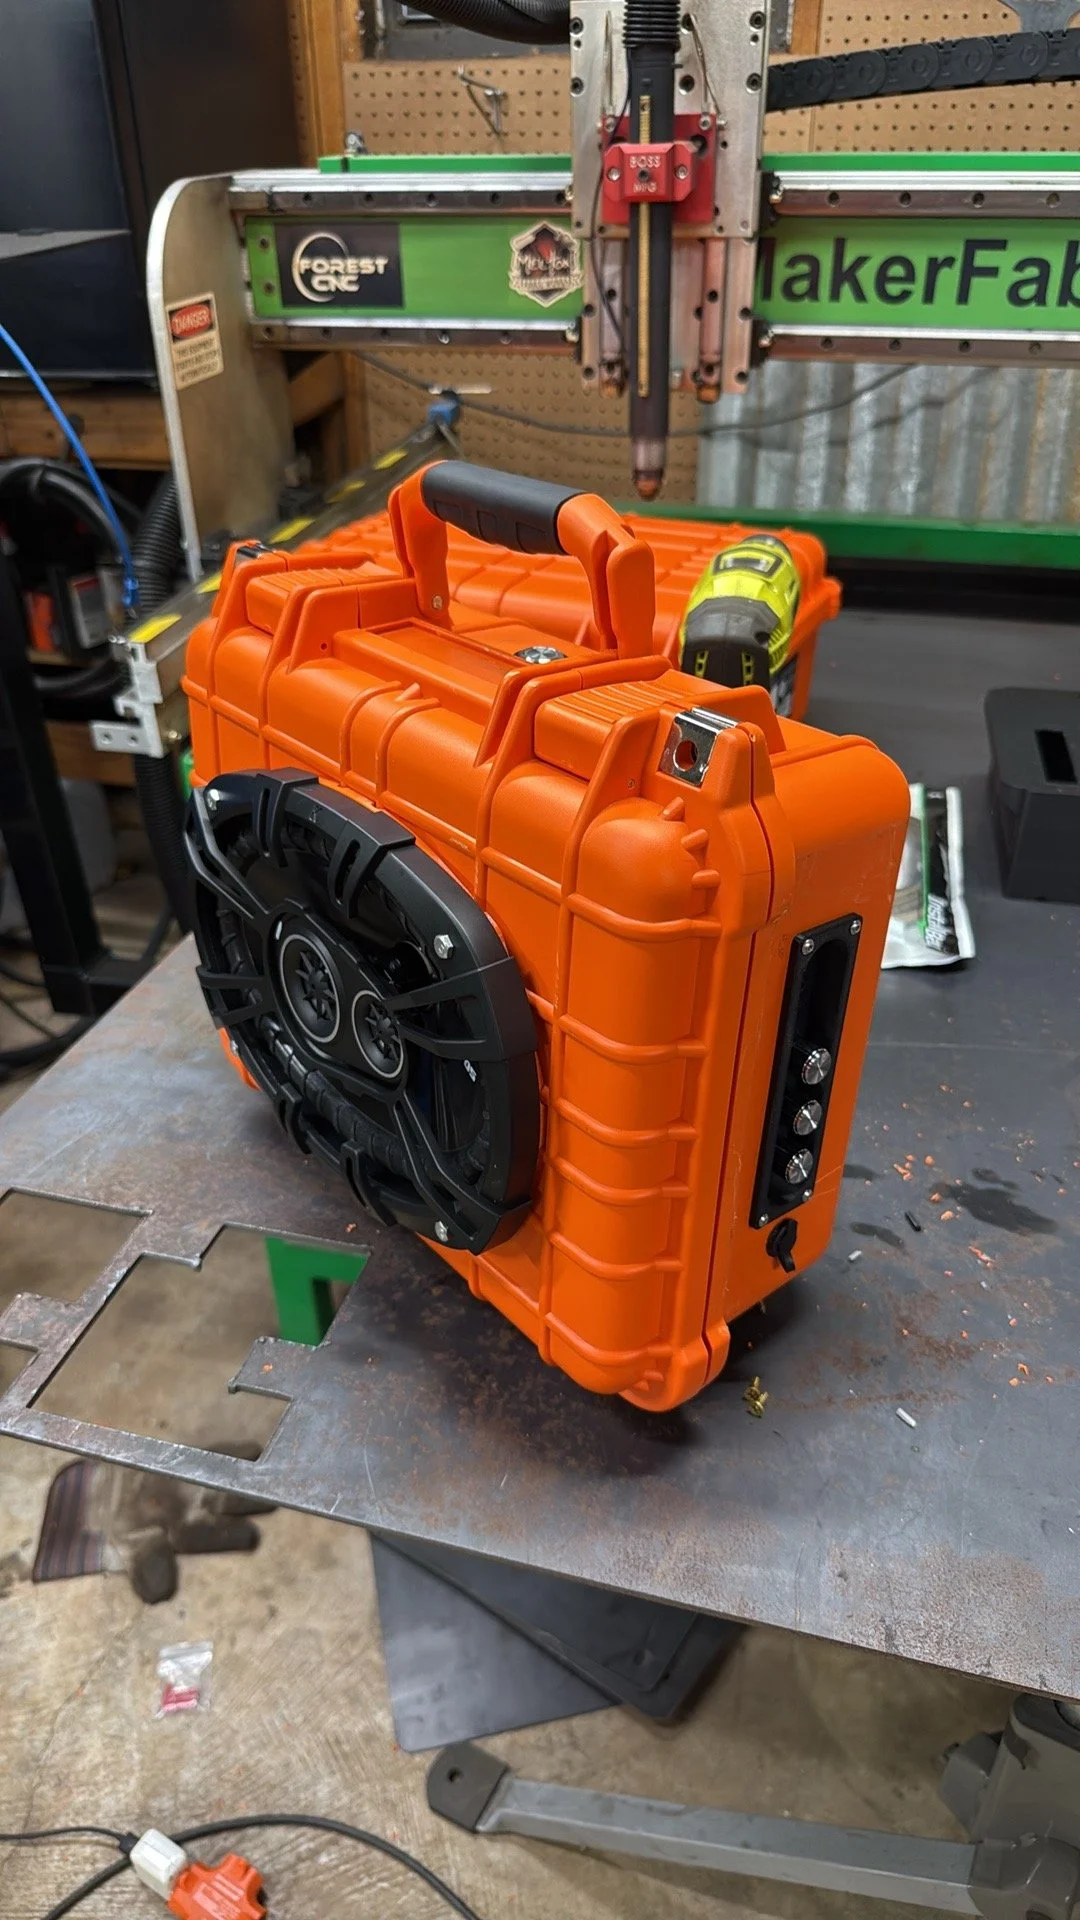
This is my Apache 2800 build, a Harbor Freight Apache 2800 case fitted with a Kicker 6×9, ZK-1001U mono amplifier, and 24V battery. It gets plenty loud, has a decent bass response, and in my opinion offers a great balance of size, performance, and cost.
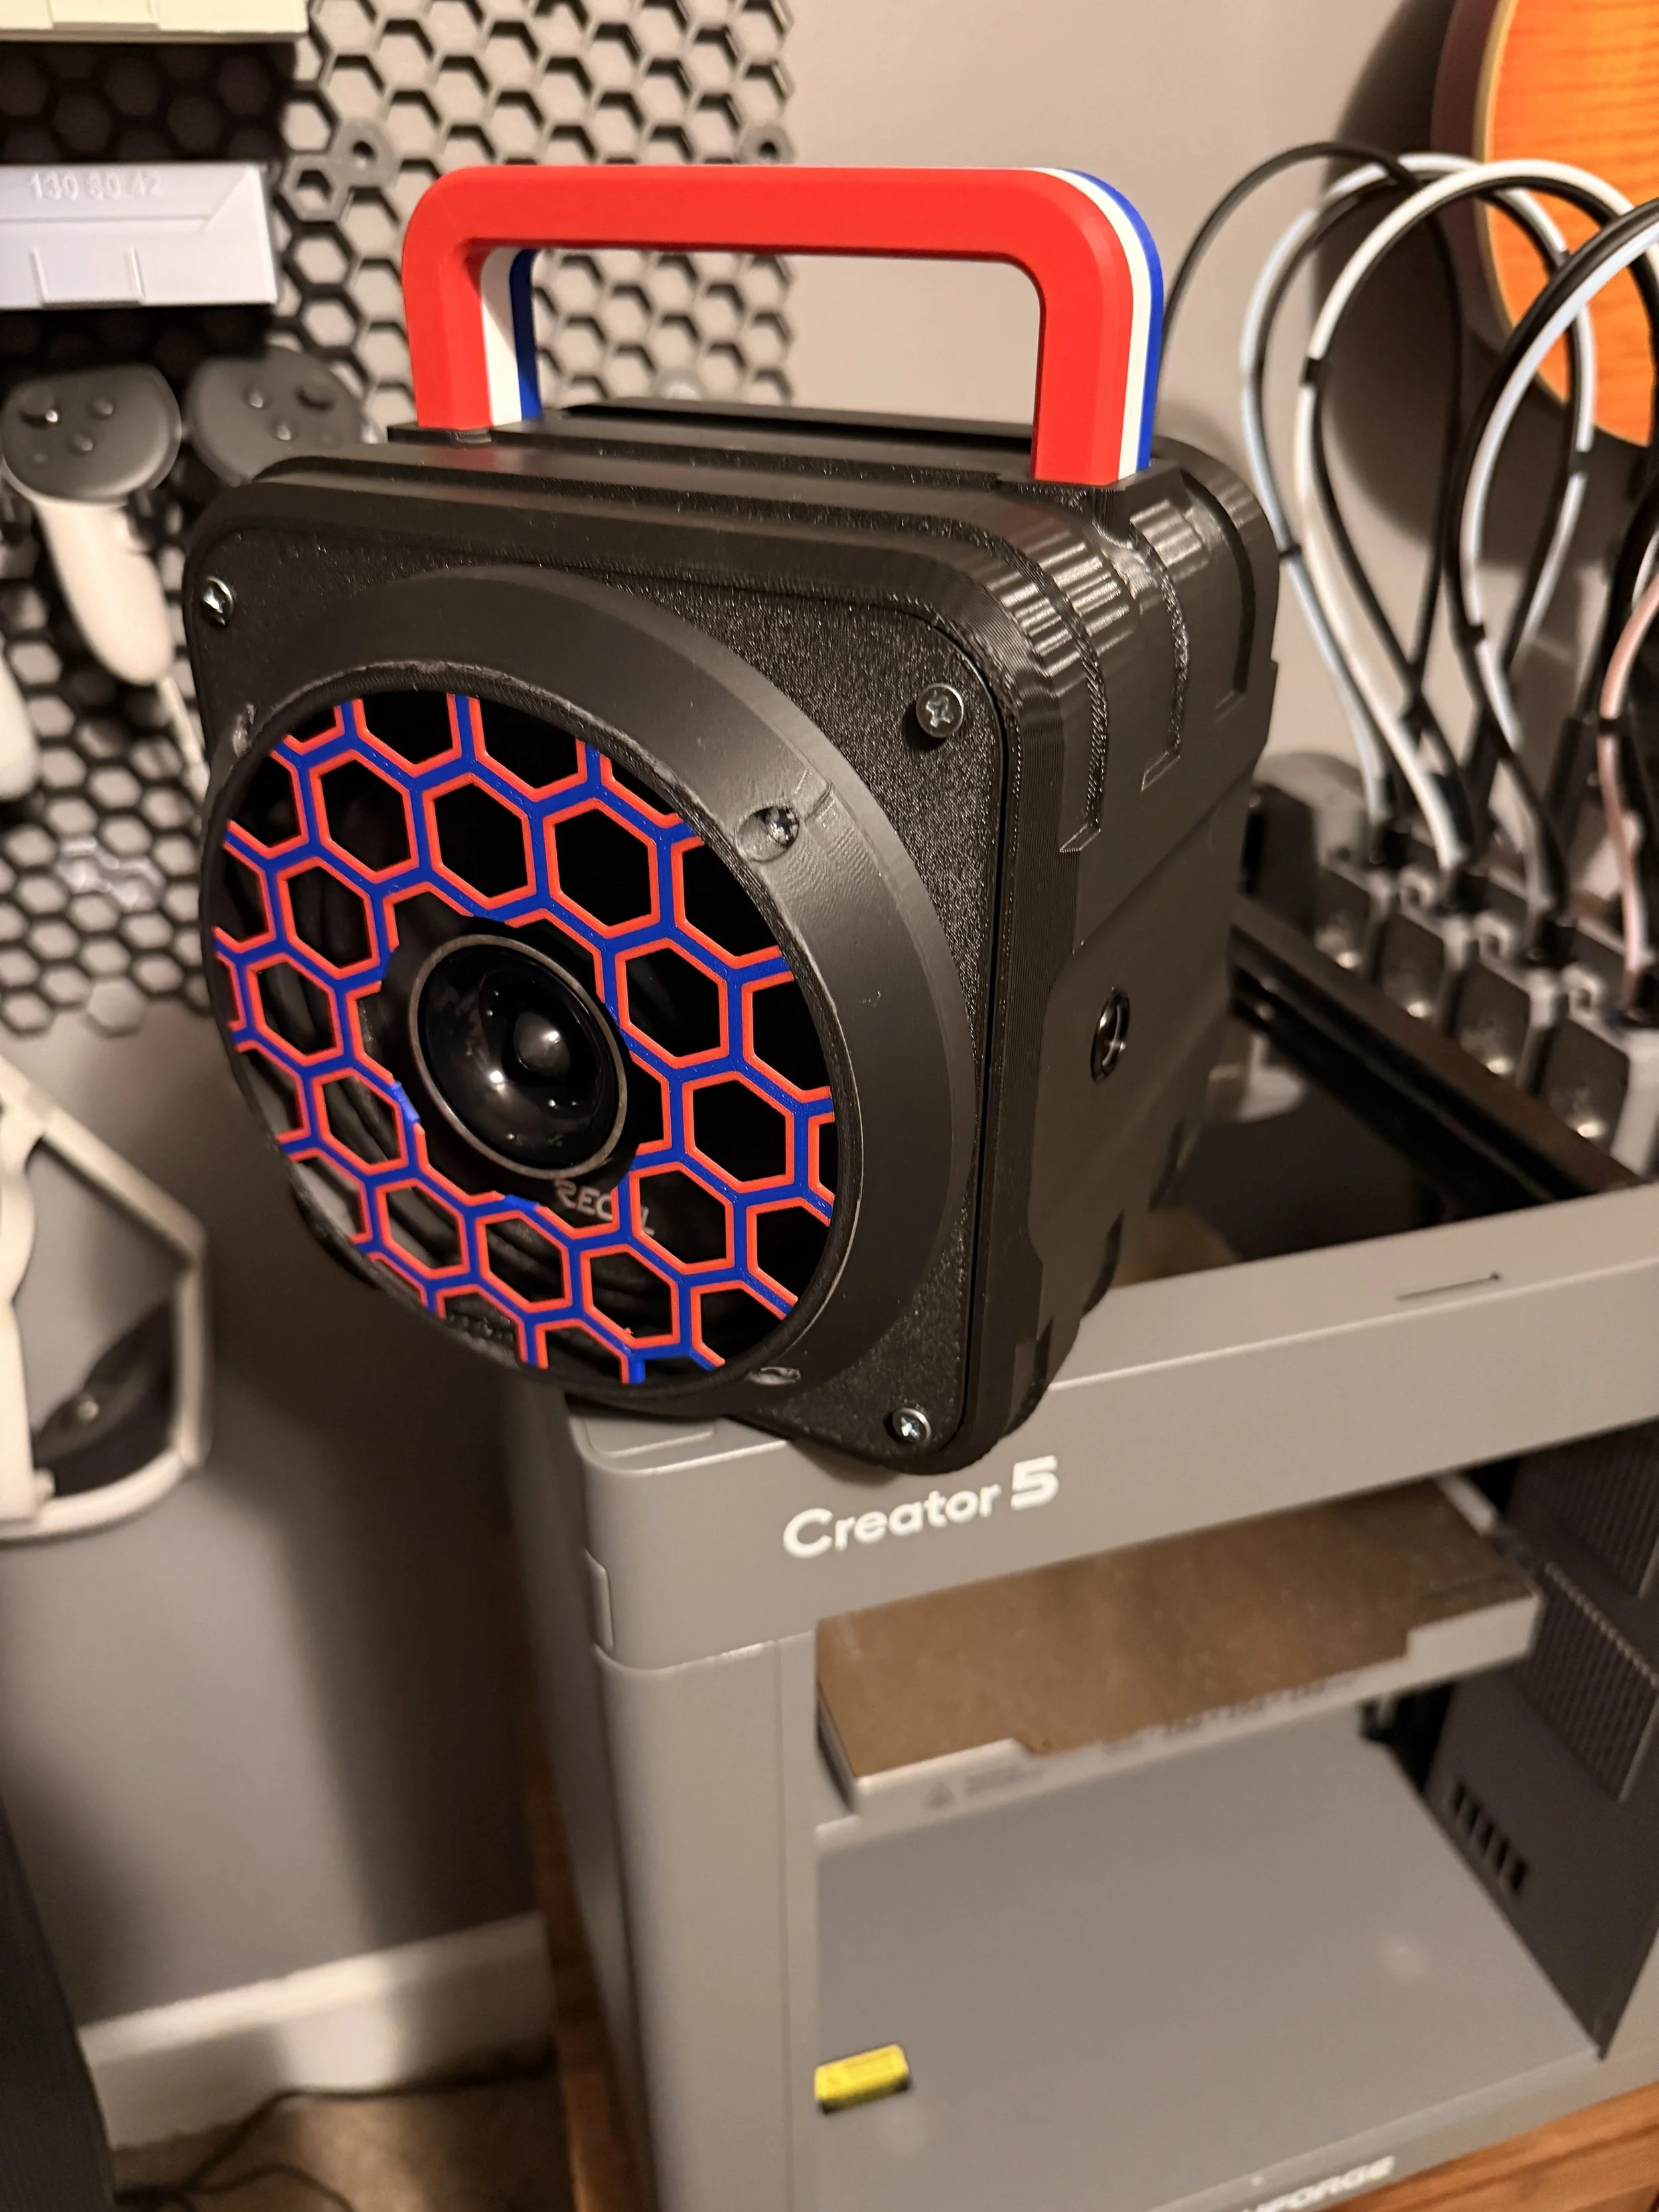
This was the first Bluetooth speaker I built, based on Chris Palangio’s “Dock Box” design over on MakerWorld.com. It uses a Recoil MX65 pro-audio speaker and a 24V battery. It was a fun build with plenty of 3D printing, and it gets surprisingly LOUD for its size. I was a little disappointed by the bass, though. If I built it again, I’d probably choose a 6.5-inch speaker with a lower frequency response to get a little more low-end out of it.
Mono Bluetooth Speaker Build
A mono build uses one speaker and the ZK-1001U mono amplifier. These builds can use either a 3D-printed enclosure, there are several good designs available on MakerWorld, or you can use a Harbor Freight Apache 2800 protective case.
A 3D-printed enclosure works especially well for compact, single-speaker builds. Just make sure the design has enough room for your specific speaker, battery, amplifier and wiring.
My favorite configuration so far is the Apache 2800 with a single Kicker 6×9. It gets plenty loud, has decent bass, and offers a great balance of size, performance and cost.
Enclosure
Choose one:
3D-printed speaker enclosure from MakerWorld
Harbor Freight Apache 2800 protective case
Harbor Freight Apache 3800 case if you want additional internal space and a deeper sound
Speaker
Choose one: (my recommendations only - do your own speaker research!)
1 × Kicker DSC6930 6×9-inch, 4-ohm coaxial speaker
1 × Recoil MX65 6.5-inch, 4-ohm pro-audio speaker
Another compatible 4-ohm speaker within the amplifier’s supported range
The Recoil MX65 gets surprisingly loud, but its pro-audio design does not produce as much low bass as the Kicker 6×9. A small enclosure with the Recoil is going to be loud but treble heavy, a larger enclosure helps these out from what I hear.
Amplifier
1 × Wuzhi Audio ZK-1001U mono Bluetooth amplifier
Power components
1 × compatible battery or regulated DC power supply (many people use 18v-24v rechargeable tool batteries (my new favorite battery is the Sun Joe 24V tool battery - see link below)
1 × battery adapter or DC power pigtail for your battery (most come with these but some tool batteries will need a custom adapter)
1 × latching power switch
1 × inline blade-fuse holder
1 × appropriately sized automotive fuse
1 × female DC barrel-plug pigtail compatible with the amplifier
A 22–24V battery provides better amplifier output than a lower-voltage battery, but verify the battery’s fully charged voltage before connecting it. Do not exceed the amplifier’s maximum input voltage.
Wiring and assembly supplies
16–18 AWG stranded copper power wire
Lever-style wire connectors (get these if you don’t want to solder or use wire nuts)
Speaker mounting spacer and screws. Most spacers are available to 3D print.
Silicone sealant for openings in the enclosure
Amplifier mounting bracket if you want, many 3D printed options available.
Battery tape or velcro to keep the battery still in the box
Protective speaker grille either included with the speaker, or 3D printed
Optional components
Passive radiators are optional and must be matched to the enclosure volume and tuned appropriately. Simply adding one does not guarantee more bass. Passive radiator can add some bass, just be sure to get the proper size
Polyfill or acoustic damping material can help with sound quality in some boxes
Exterior charging connector
Battery voltage display can be added
Stereo Bluetooth Speaker Build
A stereo build uses two speakers and a two-channel amplifier. While smaller stereo enclosures can technically be 3D printed in sections, a typical build with two 6.5-inch or two 6×9-inch speakers is too large for most hobby 3D printers.
For that reason, the Harbor Freight Apache 3800 is the more practical enclosure for a full-size stereo build. An Apache 2800 can hold two 6.5-inch speakers, but the installation will be fairly cramped.
Enclosure
Recommended:
1 × Harbor Freight Apache 3800 protective case
Alternate compact configuration:
1 × Harbor Freight Apache 2800 case with two 6.5-inch speakers
The Apache 3800 can accommodate:
1 × 6×9 speaker with a mono amplifier
2 × 6.5-inch speakers with a two-channel amplifier
2 × 6×9-inch speakers with a two-channel amplifier
Speakers
Choose one pair:
2 × Kicker DSC6930 6×9-inch, 4-ohm coaxial speakers
2 × Recoil MX65 6.5-inch, 4-ohm pro-audio speakers
2 × compatible 4-ohm automotive or coaxial speakers
For the best stereo operation, use two matching speakers.
Amplifier
1 × ZK-1002T two-channel Bluetooth amplifier
Connect one speaker to the left output and the other to the right output. Do not combine the two amplifier channels.
Power components
1 × compatible battery or regulated DC power supply or tool battery with 1 × battery adapter or DC power pigtail (my new favorite battery is the Sun Joe 24V tool battery - see link below)
1 × adequately rated latching power switch
1 × inline blade-fuse holder
1 × appropriately sized automotive fuse
1 × compatible DC barrel-plug pigtail or direct power connection
A stereo amplifier can draw more current than the mono version, particularly at high volume. Make sure the switch, wiring, battery adapter and power supply are adequately rated.
Wiring and assembly supplies
16–18 AWG stranded copper power wire
Lever-style wire connectors (get these if you don’t want to solder or use wire nuts)
Foam speaker gasket tape or silicone
Speaker mounting screws
Protective speaker grilles, included grille or 3d printed options
Amplifier mounting bracket if you want, many 3D printed options available.
Battery tape or velcro to keep the battery still in the box
Optional components
Internal divider to give each speaker its own air chamber
Polyfill or acoustic damping material
Exterior charging connector (many people leave everything inside the Apache cases and just open the cases to recharge, change amp settings, etc. This is key if you want waterproofing.
Battery voltage display
USB charging outlet
Rubber feet for the case
Additional carrying-strap hardware, etc
An internal divider can strengthen the front panel and keep the two speakers from interacting through the enclosure. Angling the speakers slightly away from each other can also improve stereo coverage.
Switch warning
Some illuminated switches use a 12V LED even though their contacts can switch a higher voltage. Do not connect a 12V switch LED directly to a 22–24V battery. Leave the LED disconnected, use a 24V-rated switch, or power the LED through a buck converter.
Links to Parts I used
Full disclosure: These are affiliate links, which means I may earn a small commission if you purchase through them, at no additional cost to you. If you find this information helpful and want to support the work I do, using these links is an easy way to do that. Thank you!
2 Channel ZK-1002T Bluetooth Amplifier Board 100W+100W Audio Amplifier Supports AUX/Bluetooth,Wide Voltage Input 12-24V
6.0Ah 24V Replacement Battery for Sun Joe iON+ 24V Power Tools
2PCS ZK-1001U Mono Amplifier Board with TWS, 100W Power Output, Vehicle Amplifier Wide Voltage Input 9-24V, Supports USB/AUX/Bluetooth (two for $30 or one for $20)
Female DC Barrel Adpater/Charging port
16mm 12v Latching Push Button Switch 5A 12V DC, IP65 Waterproof | ON/OFF, LED Angel Eye Head, 0.63" Mounting Hole, Self-Locking, Wire Socket Plug, Black Shell, Red Light
19mm 24v Latching Switch with Sasqutach Lights Stainless Steel 10A 12V 24VDC Pre-Wired 19MM 0.74"
30 Lever Wire Connectors, Mini Quick Connector Push-in, 1 in 1 Out Electrical Wire Inline Terminal for Splicing 24-12 AWG
(these make wiring a BREEZE)
KICKER DSC6930 6x9-Inch (160x230mm) 3-Way Speakers, 4-Ohm (Pair)
22.2V-24V 2.6Ah Lithium Battery, 22.2V-24V Rechargeable Li-ion Battery with Charger
RECOIL MX65 6.5-Inch 2-Way Pro Audio Midrange Coaxial Speaker | with Built-in Bullet Tweeters 560 Watts Max Pair 4-Ohm Water Resistant Grills Included
Other Helpful Resources
Boombox Builds DIY Facebook Group
https://www.facebook.com/share/g/1E7JT9nkPp/
YouTube Videos I found helpful that weren’t trying to sell me their kits:
https://youtu.be/hmfbHLM0jCA?si=YO5Pja6C47U_DuB-
https://youtu.be/4RibkEW-o6I?si=XcDOafrYRpRLkBZu
https://youtu.be/9VuF5muTrWQ?si=CJWe4qFXRiG6kmOz
https://youtu.be/WmTzukhdB4k?si=1x_N44krwAVDWa2U (this one uses a Milwaukee tool battery)
Good video on wiring: https://youtu.be/WS_RSifwkLY?si=xm5SCI0UKMSA1V07
People I trust who are making these speaker boxes for sale
If you do not want to fool with building your own, I trust Daniel, he’s making good boxes and prices them fairly.
His handle on Instagram is “fgials” https://www.instagram.com/fgials/
You can also find him on Facebook at “Phatboxed” Phatboxed
Technical Details
Powering Your Bluetooth Speaker Box
(diving into the details a bit)
Choosing a Battery
Most small Bluetooth amplifier boards can run from either a rechargeable battery or a regulated DC wall power supply. The most important thing is matching the power source to the amplifier’s voltage and current requirements.
Tool batteries are popular because they’re easy to charge, swap and replace. Adapters are available for most major brands. Self-contained lithium battery packs are another good option and often include a charger and battery-management system. Whichever type you choose, check: The amplifier’s allowable input-voltage range The battery’s fully charged voltage Whether the battery has low-voltage protection Whether the battery, adapter and wiring can supply enough current Do not assume the voltage printed on a battery is its actual maximum. An 18V tool battery commonly reaches approximately 20V when fully charged, while a 22.2V lithium pack may reach 25.2V. This matters when using an amplifier rated for a maximum of 24V. Measure the battery after a full charge before connecting it to the amplifier.
Voltage and Amplifier Output
Many small Class-D amplifier boards accept a range of input voltages. The ZK-1001U and ZK-1002T boards, for example, are typically rated for approximately 9–24V DC. Within the amplifier’s safe range: A lower supply voltage provides less maximum output. A higher supply voltage provides more available amplifier power. Exceeding the maximum voltage can damage the amplifier. The advertised wattage on an inexpensive amplifier board should be treated as a best-case figure. Actual output depends on voltage, available current, speaker impedance, cooling and acceptable distortion.
Using a Buck Converter
If the battery’s fully charged voltage exceeds the amplifier’s maximum, use a properly rated buck converter to reduce it to a safe level. The converter must: Accept the battery’s maximum voltage Provide enough current for the amplifier Have adequate cooling Be adjusted before connecting the amplifier Use a multimeter to set and verify the converter’s output voltage. You may also need a buck converter if your switch is 12v and your battery is 24v and you want to light up the LED ring.
Battery Capacity and Runtime
When comparing batteries of the same voltage, a higher amp-hour rating generally means longer runtime. A 5Ah battery should provide roughly twice the runtime of a 2.5Ah battery under similar conditions. When comparing batteries of different voltages, use watt-hours: Watt-hours=Voltage×Amp-hours\text{Watt-hours}=\text{Voltage}\times\text{Amp-hours}Watt-hours=Voltage×Amp-hours For example: 18V × 5Ah = 90Wh 24V × 5Ah = 120Wh 24V × 2.5Ah = 60Wh Actual runtime depends on volume, bass content, speaker load and amplifier efficiency.
Low-Voltage Protection
Some tool batteries contain their own low-voltage cutoff, while others rely on the tool to provide it. Do not assume that every battery will protect itself. If the battery does not have confirmed over-discharge protection, install an adjustable low-voltage cutoff module. This prevents the battery from being discharged far enough to damage it or keep its charger from recognizing it.
Using Wall Power
If portability is not important, the amplifier can be powered from a regulated AC-to-DC wall supply. The supply must provide: The correct DC output voltage Enough current for the amplifier The correct barrel-connector size The correct polarity Never connect household AC power directly to a DC amplifier board.
Wiring Your Speaker Box
The basic speaker-box circuit consists of a battery or DC power supply, fuse, power switch, amplifier and speaker. Optional components such as a low-voltage cutoff, buck converter, charging port, USB outlet or lights can be added afterward. This section is based partly on the helpful video Wiring Your DIY Boombox from Do It All Wrong Reviews, with a few additional safety clarifications.
Basic Power Circuit
The basic power path is: Battery positive → fuse → power switch → amplifier positive Battery negative → amplifier negative Disconnect the battery while assembling the wiring. Before connecting the amplifier, use a multimeter to confirm voltage and polarity at the DC barrel connector or amplifier input.
Installing a Fuse
Place an inline fuse in the positive wire as close to the battery as practical. This protects the battery, wiring and other components if a wire becomes damaged or shorted. Do not automatically use the large fuse supplied with some tool-battery adapters. A 30A fuse may be far too large for a small speaker box. The correct fuse depends on the amplifier’s current draw and the wiring size. For many small mono builds, a 3–5A fuse is a reasonable starting point. Larger stereo builds may require a higher rating. The fuse should be sized to protect the wiring and the weakest component in the circuit.
Wiring the Power Switch
The switch normally interrupts the positive wire: Fused battery positive connects to the switch’s input or common terminal. The switch’s normally open output connects to amplifier positive. Battery negative connects directly to amplifier negative. Wire colors are not universal. Follow the diagram supplied with your switch or verify its terminals with a multimeter. A basic two-wire switch has positive entering one wire and positive leaving the other. Do not connect positive to one switch wire and negative to the other. Closing the switch would create a direct short. If the switch contains an LED, its illumination voltage must also be compatible with the power system. A switch may have contacts capable of switching 24V while still containing only a 12V LED. Leave the LED disconnected, use a correctly rated switch or power it through a suitable converter.
Connecting the Speaker
For a mono amplifier: Amplifier SPK+ connects to speaker positive. Amplifier SPK− connects to speaker negative. For a stereo amplifier: Left-channel positive and negative connect only to the left speaker. Right-channel positive and negative connect only to the right speaker. Do not combine the left and right outputs unless the amplifier manufacturer specifically says the board supports it. Most small Class-D amplifiers use bridged speaker outputs. Neither speaker terminal should be connected to battery negative or treated as a ground.
Adding a Low-Voltage Cutoff
If your battery needs an external low-voltage cutoff, install it after the power switch: Power switch output → low-voltage cutoff input → amplifier Set the cutoff and reset voltages for the battery’s chemistry and cell count before using the speaker.
Adding a Buck Converter
If a buck converter is needed to protect the amplifier from excessive battery voltage, install it after the switch: Power switch output → buck converter input → amplifier Set and verify the output voltage before connecting the amplifier. The converter must be capable of supplying the amplifier’s current at high volume.
Adding Accessories
Battery displays, USB outlets and lighting should normally receive power after the main switch. This prevents them from slowly draining the battery while the speaker is turned off. Accessory wiring is generally: Switched positive → accessory positive Battery negative → accessory negative All power-system negatives can share the battery-negative connection. This does not include the amplifier’s speaker outputs. Make sure every accessory receives the voltage it requires. A 5V USB module or LED controller cannot be connected directly to a 24V battery unless it contains its own suitable voltage converter. If you want lights to operate independently, add a second switch in the positive wire feeding the lighting circuit.
Adding a Charging Port
An external charging port allows an internal battery to be recharged without opening the enclosure. The charger must be designed for the battery’s exact chemistry, cell count and charging voltage. Whenever possible, use the battery manufacturer’s charger and intended charging connection. Do not connect a generic DC power supply directly to a lithium battery. For removable tool batteries, taking the battery out and using its factory charger is usually the simplest and safest option.
Before Turning It On
Before connecting the battery: Check every connection for correct polarity. Make sure no exposed wire strands can touch another terminal. Verify that the fuse is installed in the positive lead. Confirm that the switch and wiring can handle the expected current. Measure the battery’s fully charged voltage. Set and test any buck converter. Confirm that the speaker impedance is compatible with the amplifier. Secure the battery and wiring inside the enclosure. For the first test, turn the amplifier volume down. Power it on, confirm normal operation and then gradually increase the volume while checking for hot wiring, unstable operation or distortion.